
Q. Where did the settlers of Jefferson County, NY, come from?
A. Most came from New England and New York, but there were important landowners from France who contributed to the early culture, and there were Quaker settlers, as well as German, Swiss, Irish, and Welsh. Their influences can be seen in the stone building tradition.
Calvin Britton House, Brownville
The Calvin Britton House, 1815-16 was built into the hillside and surrounded by stone fences. It has especially thick walls, a recessed front door and plan that reflect the first owner’s English roots.
Stone House, Cape Vincent
This is the St. Lawrence River façade of the Stone House built for Vincent Le Ray in 1815. The Le Ray family were important early French landowners. The house is of coursed limestone quarried on nearby Carleton Island. Elliptical segmented arches with fan lights top the first-floor windows and doors. Thankfully, the wooden balustrade remains in place.
Q. Who were the masons and builders?
A. We know the names of only a few of the stonemasons: Asa Eggleston, Asa Gates, Ignatius Wiley, Hugh MacPherson, Hial Cook, and Paul Anthony. There was master builder David Granger and designer of the barracks at Sackets Harbor, William Smith. The countless quarrymen who cut and formed stones for these houses go unacknowledged. Many are presumed to have come into the area after working on the Erie Canal which was finished in 1825.
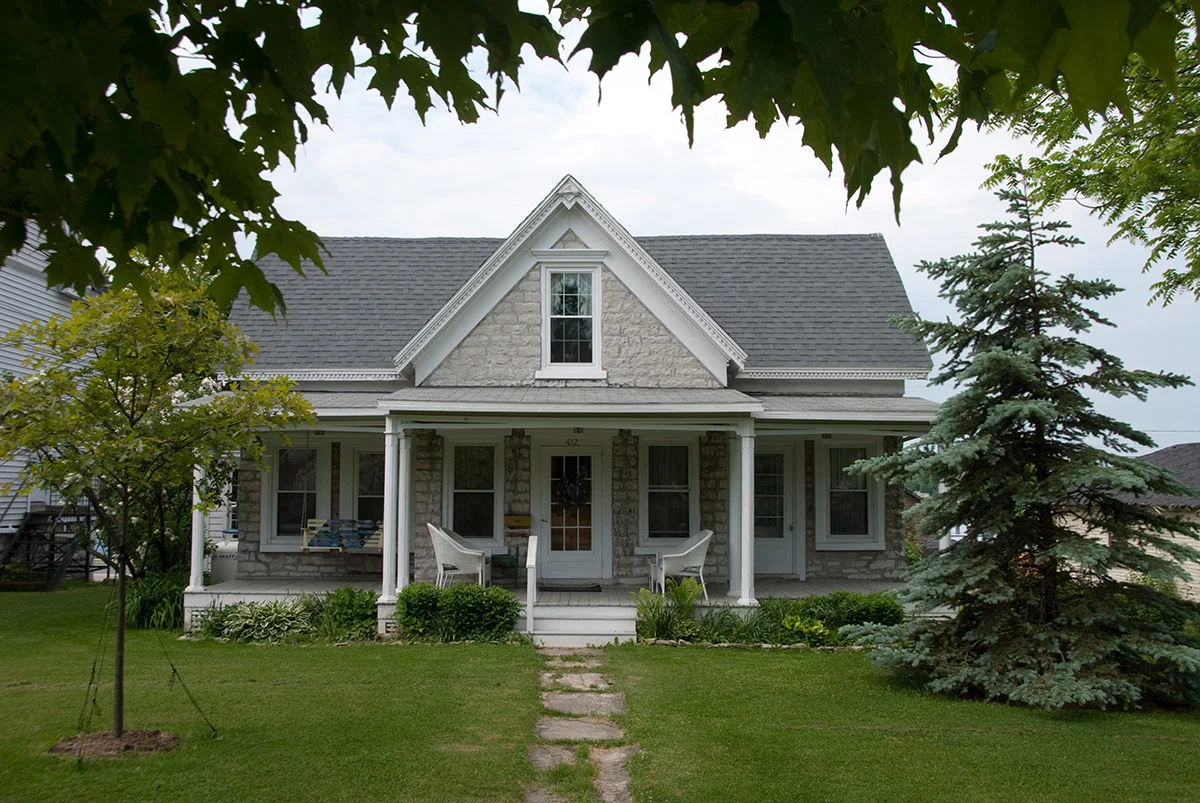
Asa Gates House
Original 12/8 window
Stone mason Asa Gates built this lovely two-story home for his wife in 1828. It retains the beehive oven in the kitchen. Nearby is a stream of “the finest water.”
Engraved initials of Asa Gates over the front door
Q. What was the building style in Jefferson County?
A. Although there are many similarities, no two of the county’s stone buildings are alike. They range from elegant mansions in the Federal and Greek Revival styles to small one-and-a-half-story vernacular farmhouses.
The Angel House, c 1853, Gothic Revival cottage style in Clayton.

Mill Creek Bridge
Stone was also used for bridges, like this one built over Mill Creek in Sackets Harbor in 1819.
Q. Could you suggest a recipe for soft mortar suitable for an old stone house? I am told not to use the hard mortars readily available in hardware stores.
Soft Mortar Mix #1
3 parts sand
1 part type S hydrated lime
water as required
Mix the sand and lime together.
Add water to the required consistency (see note below).
Can be kept for indefinite period if wetted and covered with plastic.
Soft Mortar #2
1 part white Portland cement
2 parts type S hydrated lime
9 parts sand
Mix Portland, lime, and sand together.
Add water to required consistency.
Use the same day mixed.
A note on mortar mixes: While we want a neat and precise formula for mixing mortar, historically, the optimum mixture would take into account the humidity, moisture in the sand and characteristics of the local lime that was used in the mix. These would be judiciously and scientifically balanced by the measure of the experience of the mason. Note too that the measures of each component would have been by the rough shovelful, thus some latitude in practice.
Early sources recommend for each one part of lime, two to four parts sand. Mechanically, one would want to make sure that there is enough lime (acting as the cement) to come into contact with each grain of sand. While this brings a picture to mind of quantity, it also highlights the need to mix it very well. The old mason’s adage is that the mortar is properly mixed when the last water added comes from the sweat off the brow of the apprentice doing the mixing.
In general, a mixture with more lime is more plastic, or malleable; when working with brick or neatly cut stone (ashlar), characterized by tight beds and joints (the spacing below and beside the stones, respectively), one would desire a mixture that is more plastic, allowing the mortar to be more thoroughly distributed into tight spaces. In this case, a mixture of two to one sand to lime might be appropriate.
When a mixture has a greater proportion of sand, an economy in volume is gained, the mixture is stiffer and has better compressive strength (as lime is the cement and sand is the aggregate in the mix). The economy is important because when working with rough stone, a very large amount of mortar is needed to fill the large interstices between stones and the rubble infill in the middle of the wall. In this case, a mixture up to four to one might be desired.
Mix 1 and 2 above each reflect a mixture of three to one, sand to lime. In the case with Portland added, the cement portion of the mix is divided into 1/3 part Portland to 2/3 parts lime. This is said to offer a quicker set but because Portland has a fast set, it should be used in the same day it is mixed. When your historic house was built, there was no such thing as Portland Cement.
The idea that water can be added in a fixed proportion is a prescription for heartache. For example, sand can hold a lot of moisture so if the sand has been exposed to rain, the amount of water needed in the mix is much reduced. If a mortar mixture becomes too wet, it is very difficult to correct it by adding sand and lime. And, if a too-wet mortar is used, it will be of weak bond and less durable to weather exposure. Even though it is more difficult to mix mortar when dry and stiff, this is the best procedure for mixing, with small quantities of water added with subsequent mixing. If done manually, it is easier to control (and better exercise).
The mortar is the proper consistency when you can turn over a trowel holding a fistful of mortar and it will stick to the trowel. The lime-sand Mortar Mix #1 can be kept usable for days by wetting the surface lightly after each use and covering it tightly with plastic so no air gets in.
Equally important, especially after all this work, is the need to keep work moist and humid as much and as long as possible. This is essential for the proper curing and setting of the mortar especially on exterior work. Usually a re-pointing project takes a long time so a burlap covering can be wetted several times a day for several days. In keeping the areas of immediate work moist, a hand spray bottle for misting is very useful. Don’t get it so wet that the water runs down the face of the work and protect it from direct rain. Try to keep it frequently moistened for at least a week. The hot summer months are best for this work; don’t try to apply mortar too late in the year or if the temperature is going to be in the 30’s at night. It will not set properly and you will be greeted with rework the following year.